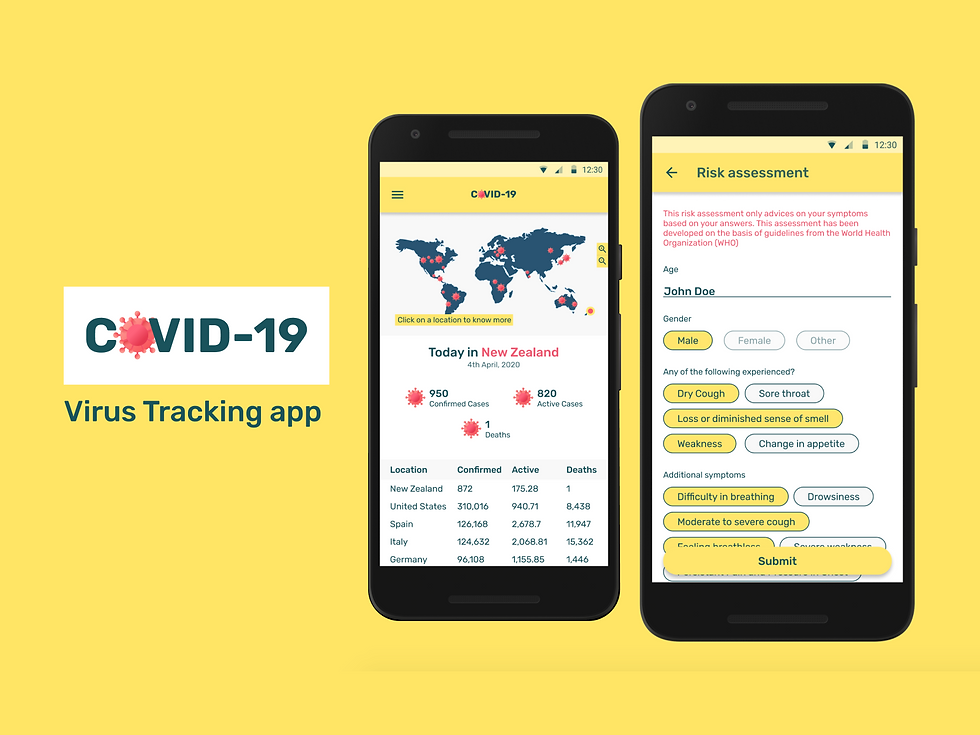
COVID - 19 Virus Tracker application
- May 29, 2020
- 2 min read
Updated: Oct 25, 2025
With the growing fear of the pandemic COVID-19 in 2020, the designers around the world wanted to contribute something to the world with their creativity and I was one of them. There were challenges on platforms like Uplabs, which encouraged us to design apps relevant to the current scenario which might sooner or later inspire a developer to make an application out of the concept.
The Problem
The people around the world should be able to
Stay updated during the global pandemic
Judge themselves of having the infection
Request for medical aid when needed
Know the virus better
Feature list
Here is what the application should be able to do:
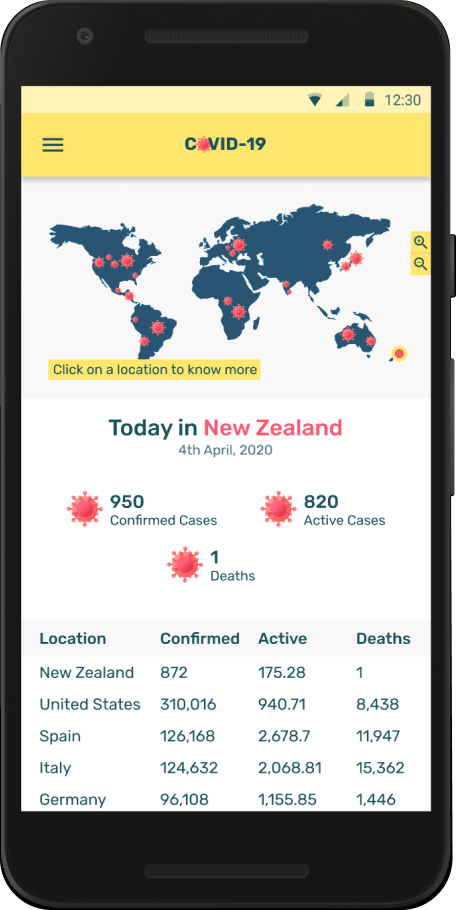
Live tracking of cases
This helps the user to know the current stats simply by clicking on a location on the map
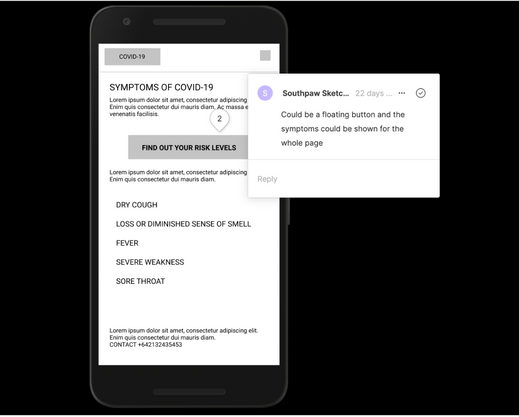
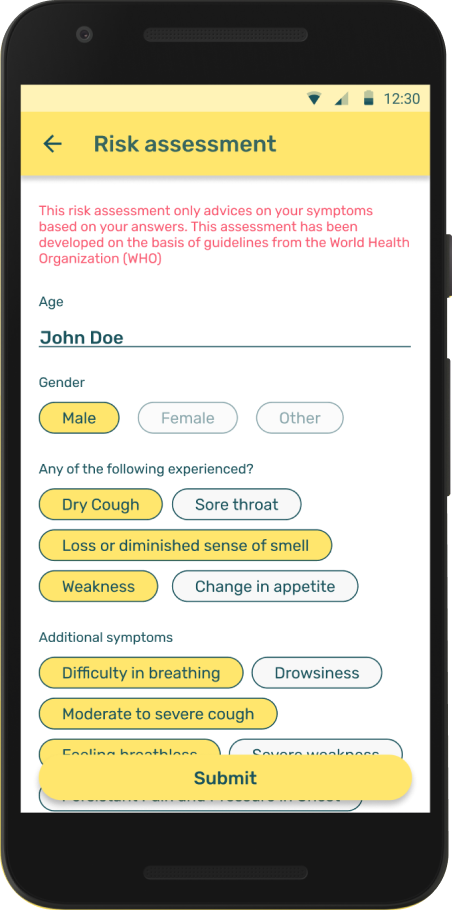
Symptom checker
This shows a list of COVID-19 symptoms and a risk assessment questionnaire for self assessment on whether or not a user has any symptom
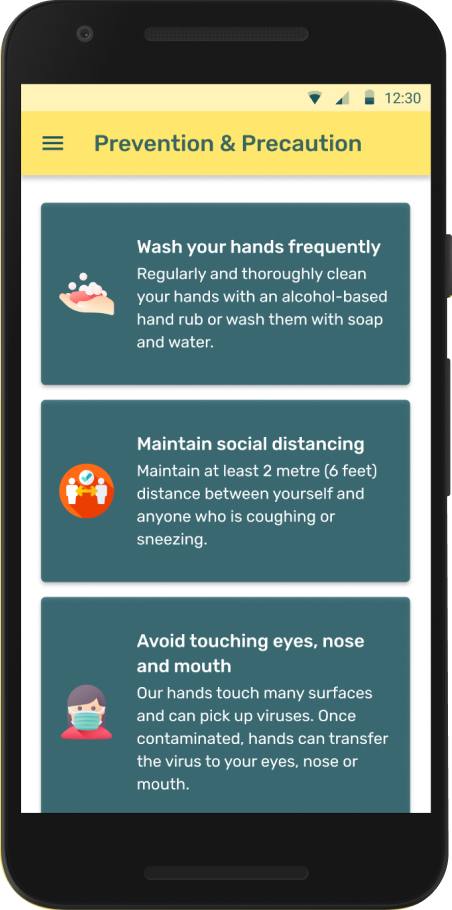
Precautions and Prevention tips
A dedicated page for prevention tips shown using an easy-to-understand infographic, to reach people better. Also a knowledge base of articles about the virus to bust myths spread online
Request Medical Aid
There is a form to request medical assistance remotely both for the user and for someone they know who might be needing the help

Ideation
I used MIRO to create my brainstorming board and I came up with the base idea of what my app should contain.

Wireframing on Figma
The most preferred tool for design for me personally is FIGMA. After my brainstorming on MIRO, I jumped to create some Wireframes on FIGMA. With the basic ideas that I had on what each page would contain, I came up with these wireframes.

Prototype - Test - Repeat
I prototyped the wireframes with all the key elements in place and tested it out with my partner at home. I found a few gaps and made him comment them on my prototype.
I then made those corrections in my mockups stage. This testing gave me a better insight on what would make my app more usable.


My Design System
I clearly knew that my first step into UI design would be to create a design language for my app. I started with a styleguide. I used coolors.co to generate my colour palette and chose fonts from Google Fonts. Flaticons was where I found my interesting icons. I laid out my style guide on a Figma page and created components from them


Mockups
I started my UI design with material design guidelines and added few interactions to make the prototype look more real. I chose to keep the UI simple and easy for anyone to use.


Learnings
Throughout the design and test process, I kept getting better ideas on scaling up my application. With more tests and comments from my friends I was able to find what all I was missing while designing.
After I submitted my challenge application, I had opened my platform for more test users. From their comments I only got better ideas on how to make my app more usable and scale it better.
Try out my Prototype and leave your comments 😊!


